¶ Adding Animations in Toolkit
¶ written by lumadaire and CatastrophicalCat
This tutorial assumes that you've already created poses or animations in Blender following the Custom Animations Blender Walkthrough.
I will go over:
- How to add ShortNames, EmoteCollections and EmotePoses/EmoteAnimations
- How to add your pose/animation in the Toolkit
- How to override the _Base file corresponding with the pose/animation you exported from Blender
Disclaimer:
- At the moment, this is for body animations and not facial ones, though you might be able to go through the same process with the files relevant to the face.
- Currently, photomode pose/animation mods override one another, so you can only have one in your load order at a time. Keep this in mind when publishing your mod.
¶ 1. Setup in Toolkit
¶ 1.1 Creating a new project
If you are new to the Toolkit, here is a guide on how to get started with it.
When you're more familiar with the Toolkit, create a new project and name it accordingly
¶ 1.2 Setting up the _Base file
Once you've set up your project and chosen a level (I usually choose Basic_Level_A) it's time to add the relevant files to your project.
Go to the ‘Create and view resources’ tab as shown below
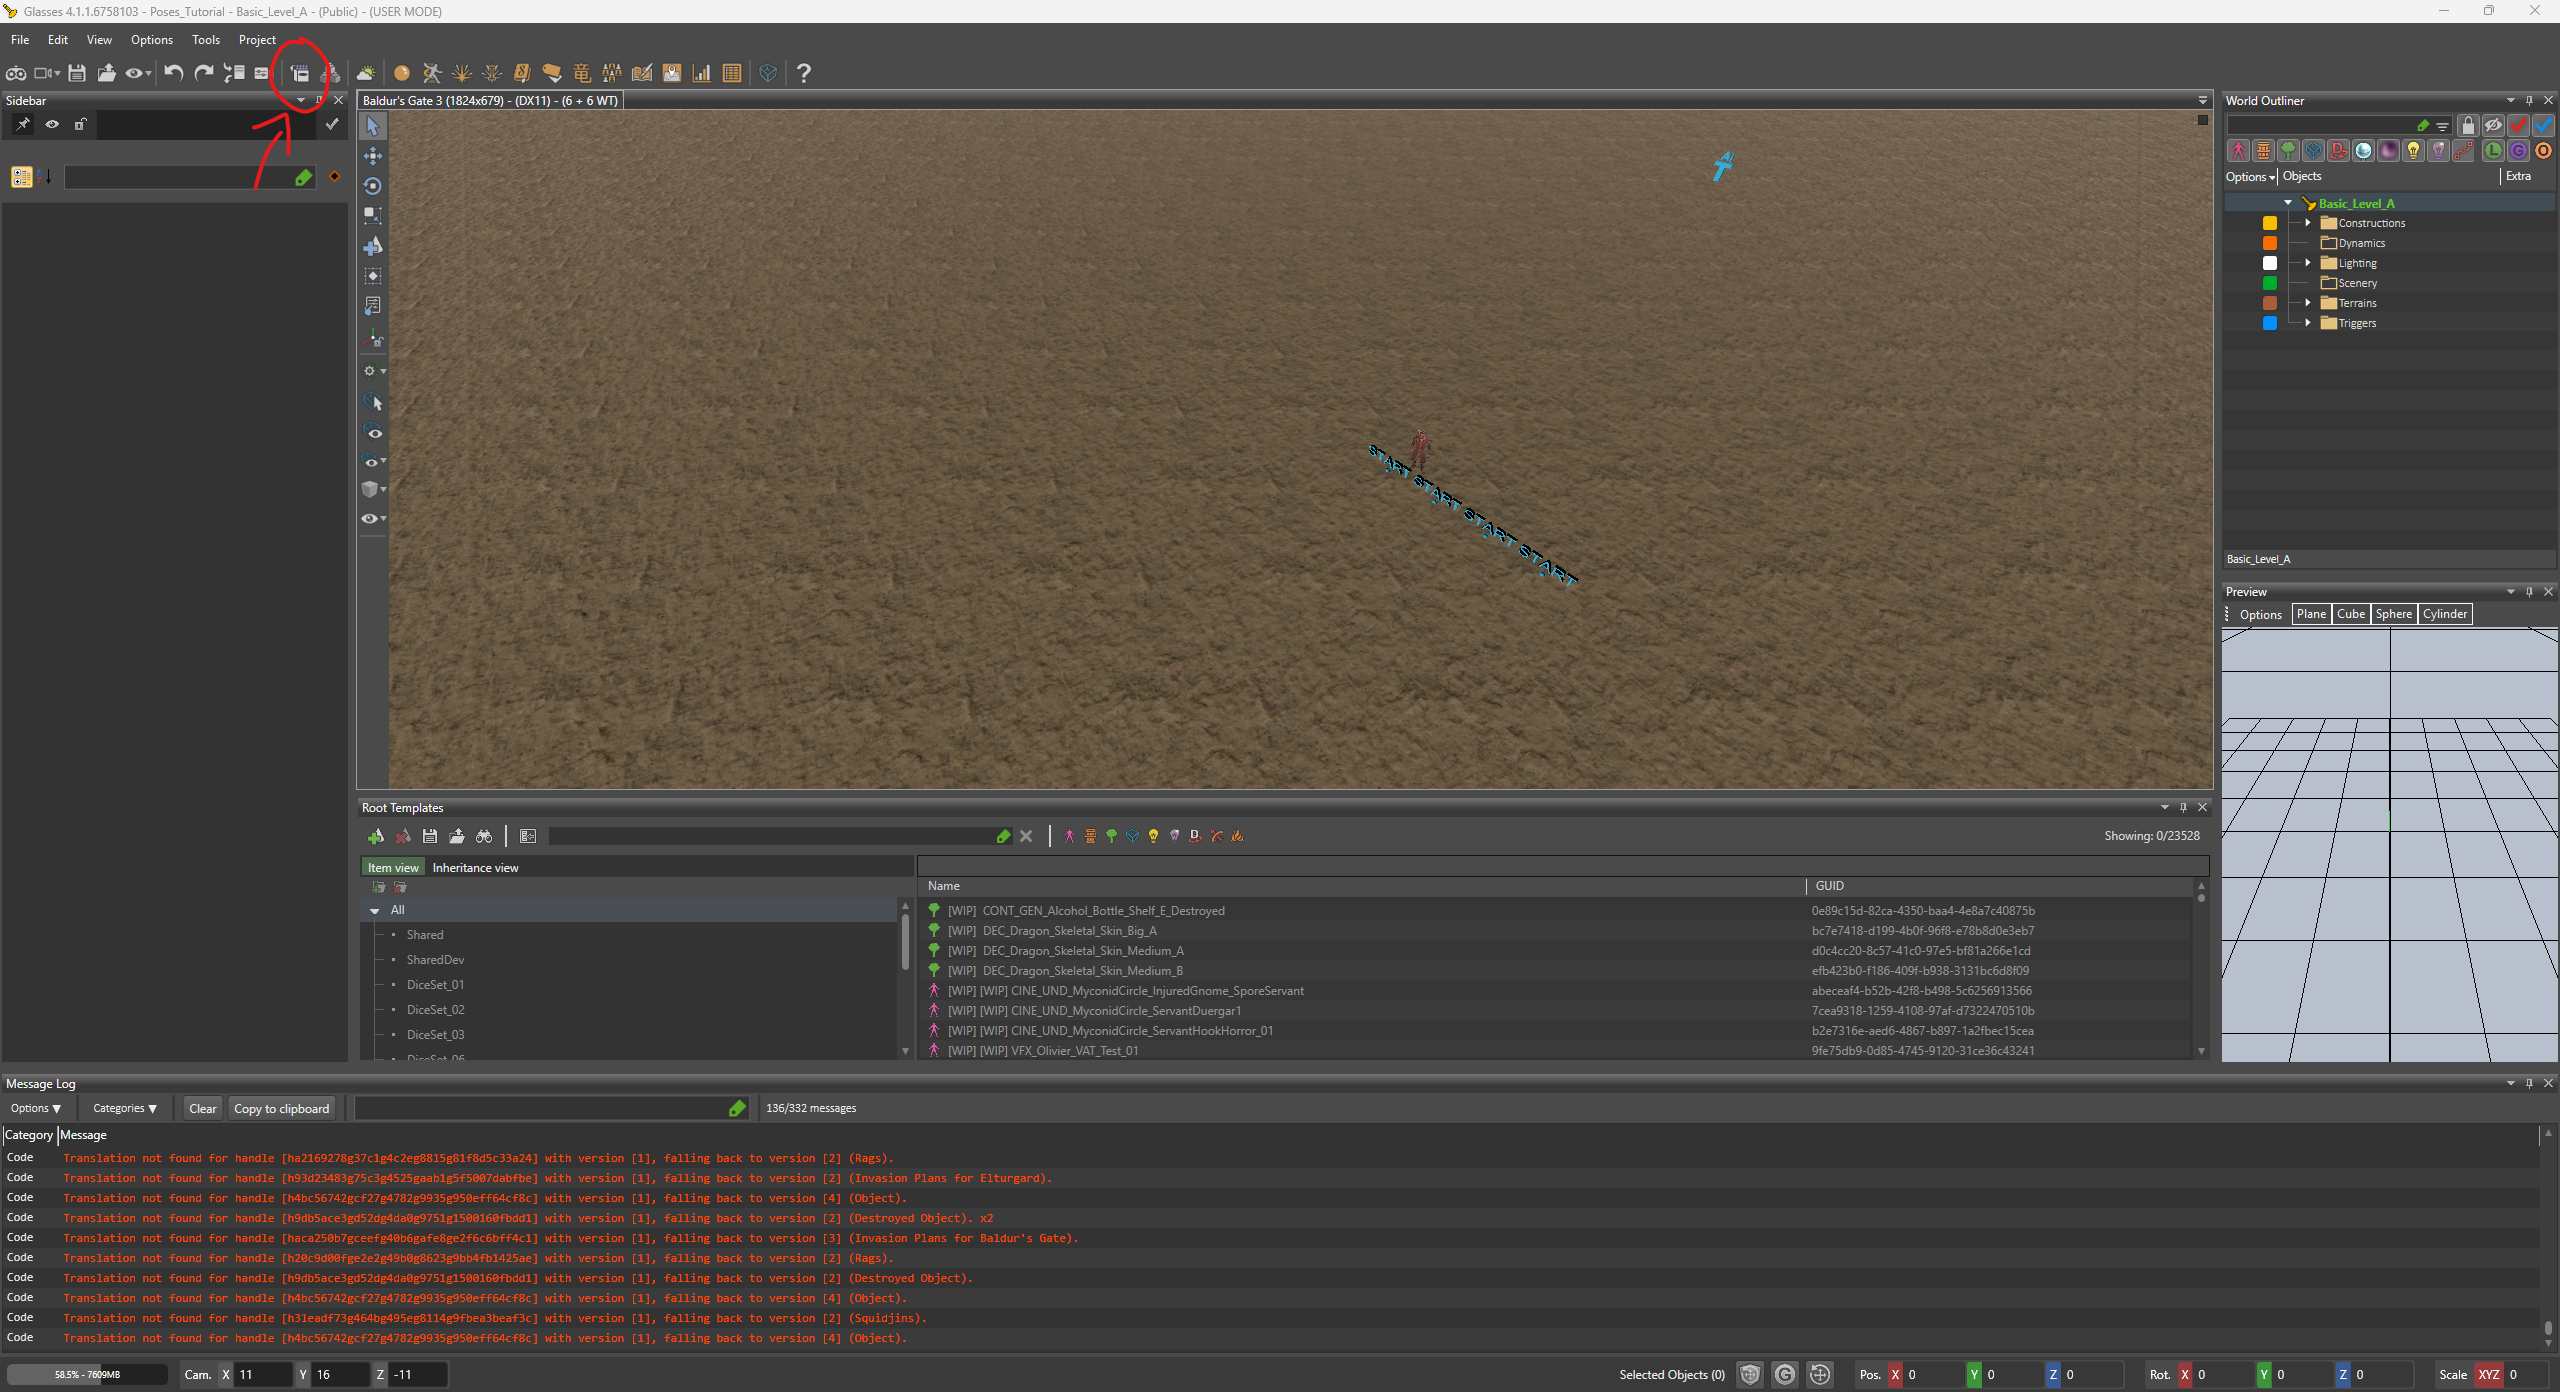
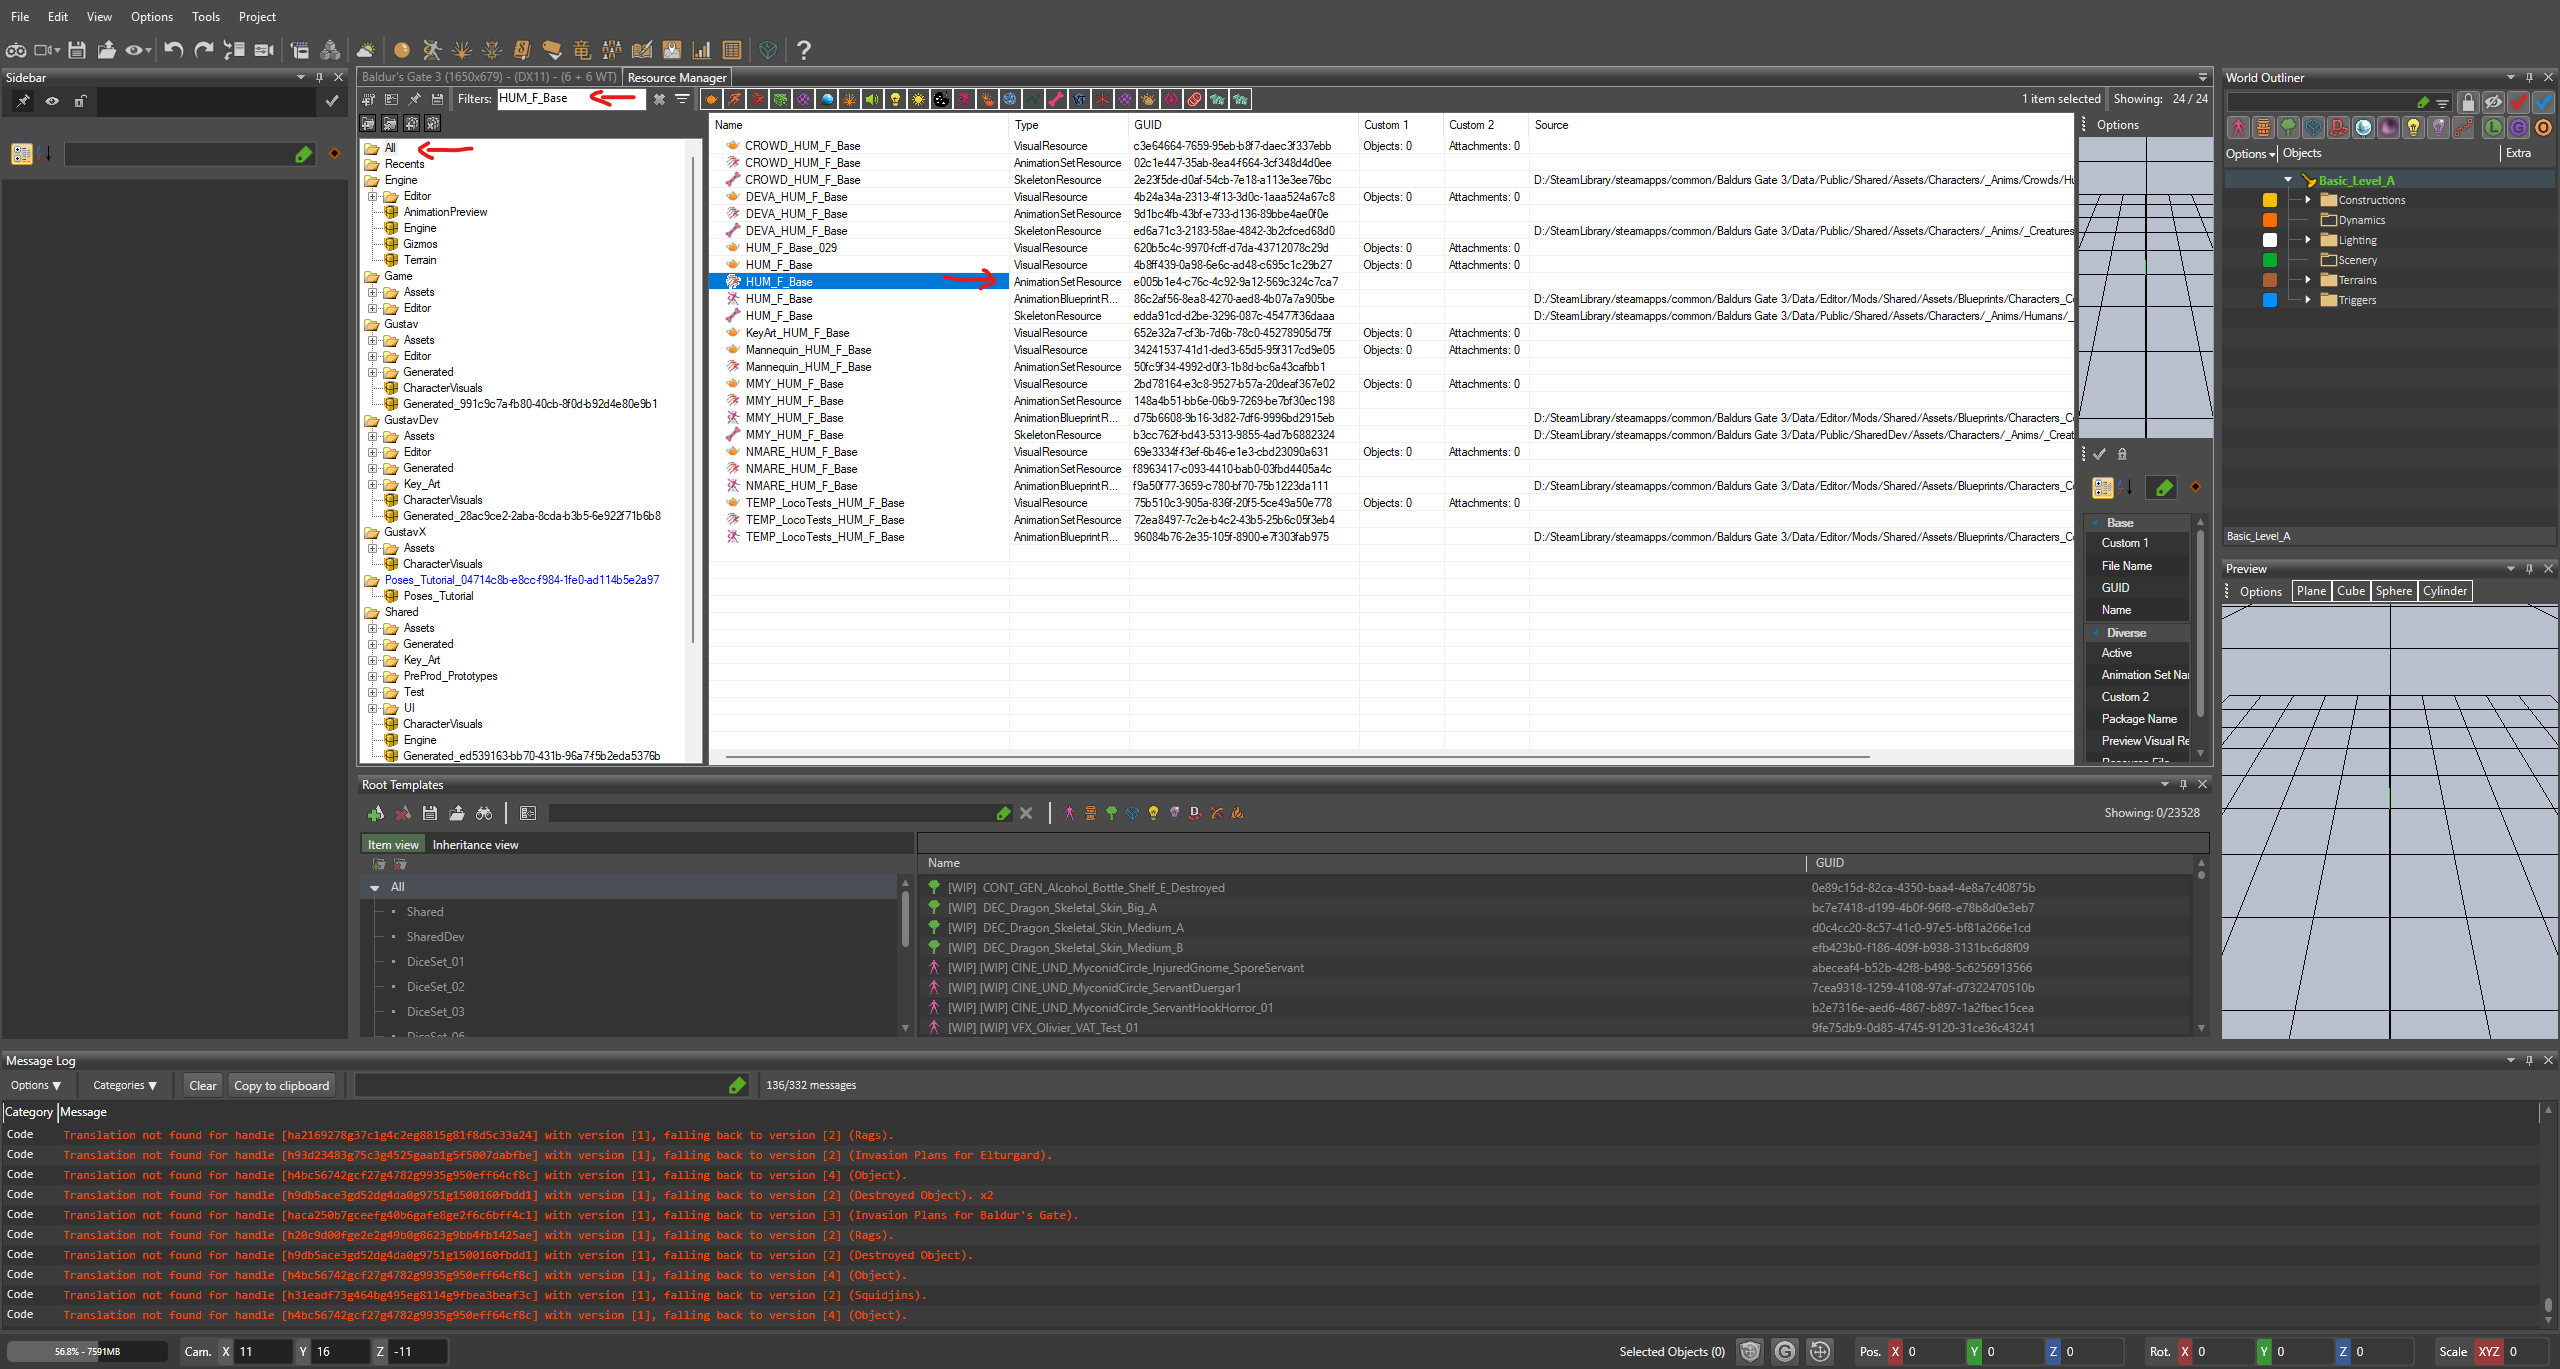
Now to finding the _Base file(s) that you need. While in the ‘All’ folder, search for the _Base file that you need for your animation in the ‘Filters’ search bar.
Here's a list of the different body type _Base files:
- Dwarf: DWR_[F/M]_Base
- Dragonborn: DGB_[F/M]_Base
- Gnomes: GNO_[F/M]_Base
- Halflings: HFL_[F/M]_Base
- Humans, Elf variants, Tieflings, Githyanki: HUM_[F/M]_Base
Note:
Everything will default back to the HUM_M_Base if the other bases don't have an animation set into them, (everyone gets to use the HUM_M_Base ones) if something is just in the HUM_F_Base then only the BT1 characters can use those ect for other bases.
After searching for the _Base relevant to you, you need to find the one of type AnimationSet, as shown below.
Select the _Base, right click on it and choose ‘Override in the Active Mod’
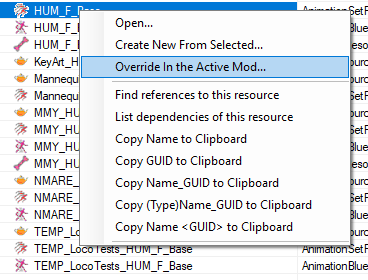
The Toolkit will ask you if you're sure, select ‘yes’. Select ‘yes’ when it asks you if you want to keep the ssame package structure. If you want to keep the file within custom folders, select ‘no’ and choose your resource package. You also don't need to rename this _Base file, as any changes overrides the vanilla one anyways.
The file should now appear in your mod projects folder.
¶ 1.2 Setting up the animation files
To import you custom animation, you first need to find an existing vanilla pose.
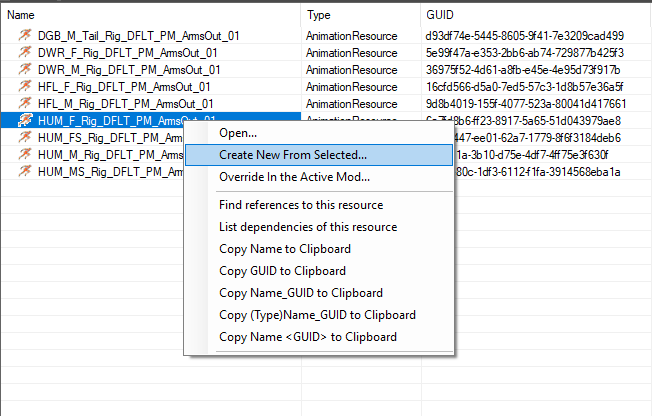
In the ‘Filters’ search bar, type in ‘PM_Armsout’. This is an animation that contain all the static poses for the collection ‘Arms out’ in the game.
Instead of having one animation file for each static pose, Larian puts each pose in a collection into one animation file. The timing for each pose is then set in the Object UUID Editor. (At a later point, there will also be a tutorial on how to add several static poses in animation in Blender. ETA unknown.)
To add an animation to your own project, select the animation that suits the race you want to add the animation to. So if you're adding an animation for ‘human’ body type one, select the animation with the prefix HUM_F_.
Right click the animation and select ‘Create New From Selected’.
Select the resource package you want the file to go in (I usually pick the one that says [Project name_UUID]//[Project name]), and rename the file to something more relevant to find it more easily later.
If you only have one animation (not static), you should only have one per file which you name accordlingly (including the abbreviation for race and body type, for easy management). If you have an animation with several static poses, I recommend naming it something like [Mod name]_HUM_[F/M]_Pack_[number]. If you currently don't have an animation with several static poses, simply add a file for each pose and have the suffix named Pose_[number] instead of Pack.
You should now have two files in your project folder:
- The _Base file of type AnimationSetResource
- An animation file of type AnimationResource
When you want add more animations, right click the animation file in your project folder, select ‘Create new from selected’ and rename it. Next, we'll be going over how to add entries in the UUID Object Editor
¶ 2 The UUID Object Editor
¶ 2.1 Shortname Categories
Shortname Categories are not Striktly needed but they make your animations easy to find in the _Base
If you don't want to add them skip to “2.2 ShortNames”
In the Toolkit, open the UUID Object Editor, location shown below.
On the left hand side, you should see a list of projects. Expand the project with the name of your mod.
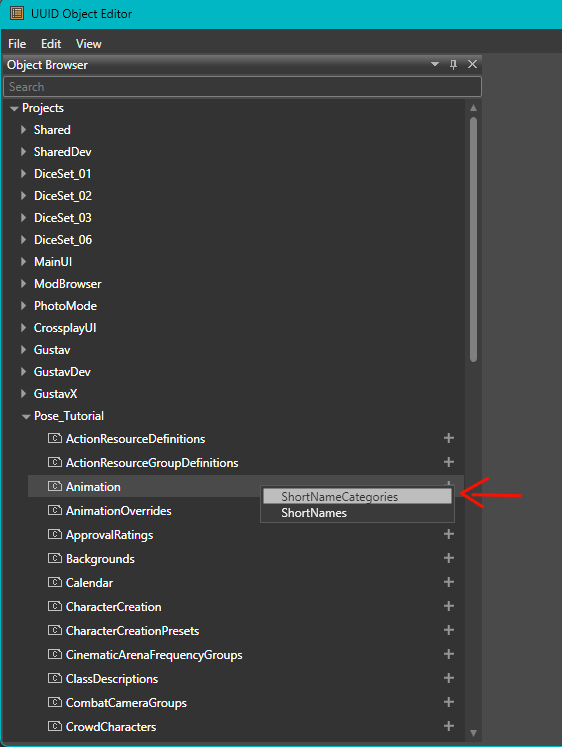
Now you want to add ShortNameCategories for the animation files you have. Navigate to the ‘Animation' line, press the ’+' symbol and select ‘ShortNameCategories’.
A new file names ‘ShortNameCategories’ should generate under ‘Animation’, double click it to open it.
For a Name you only need one per mod but you can do multiple if you like it to sort them more specifically.
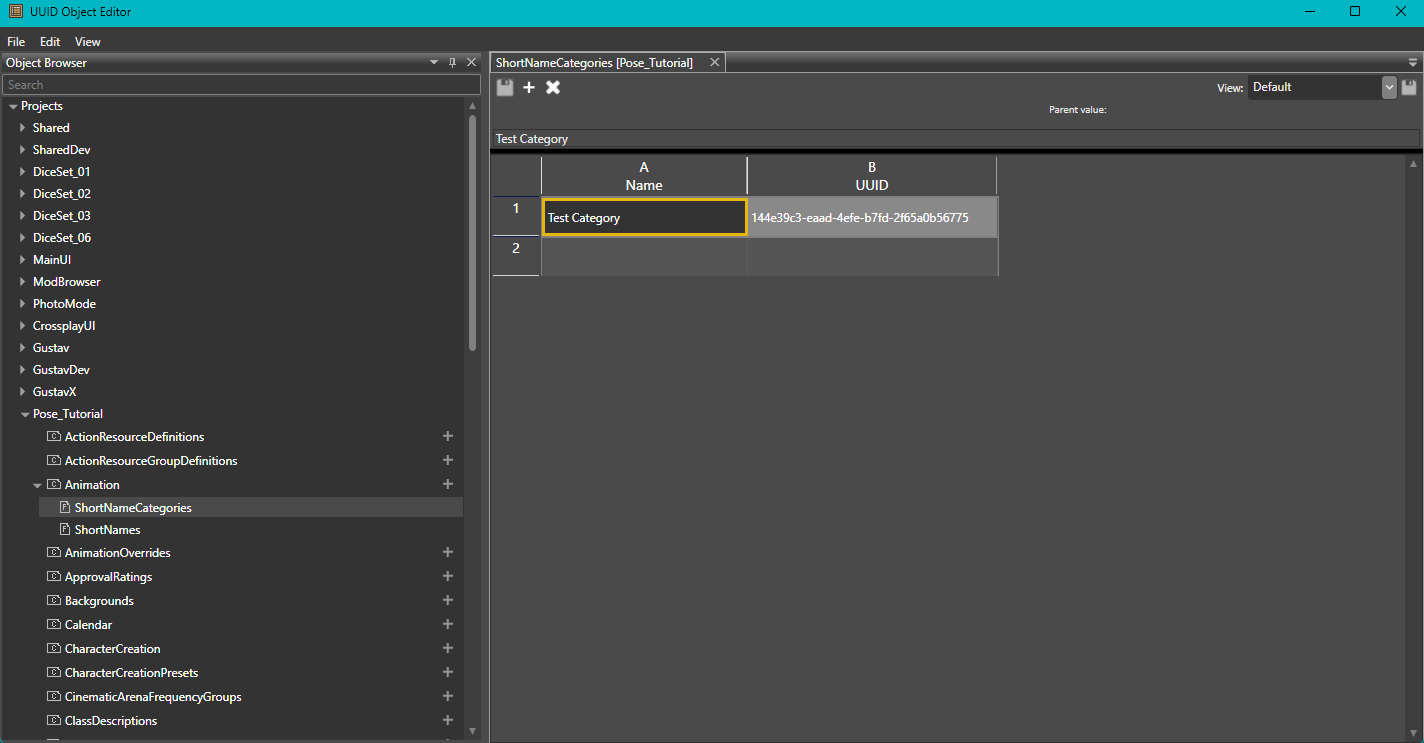
After Naming them hit enter and Press CTRL+S to save and export the file.
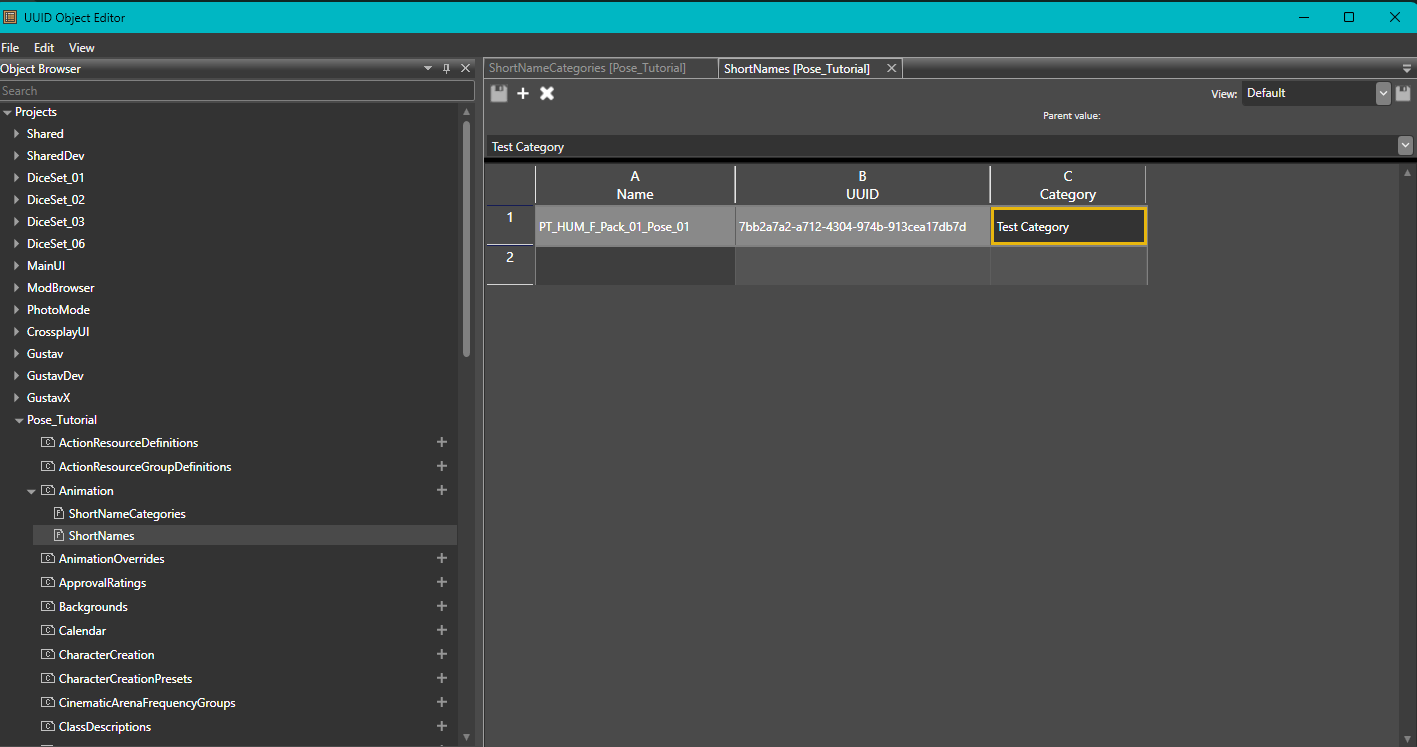
2.2 ShortNames
In the Toolkit, open the UUID Object Editor, location shown below.
On the left hand side, you should see a list of projects. Expand the project with the name of your mod.
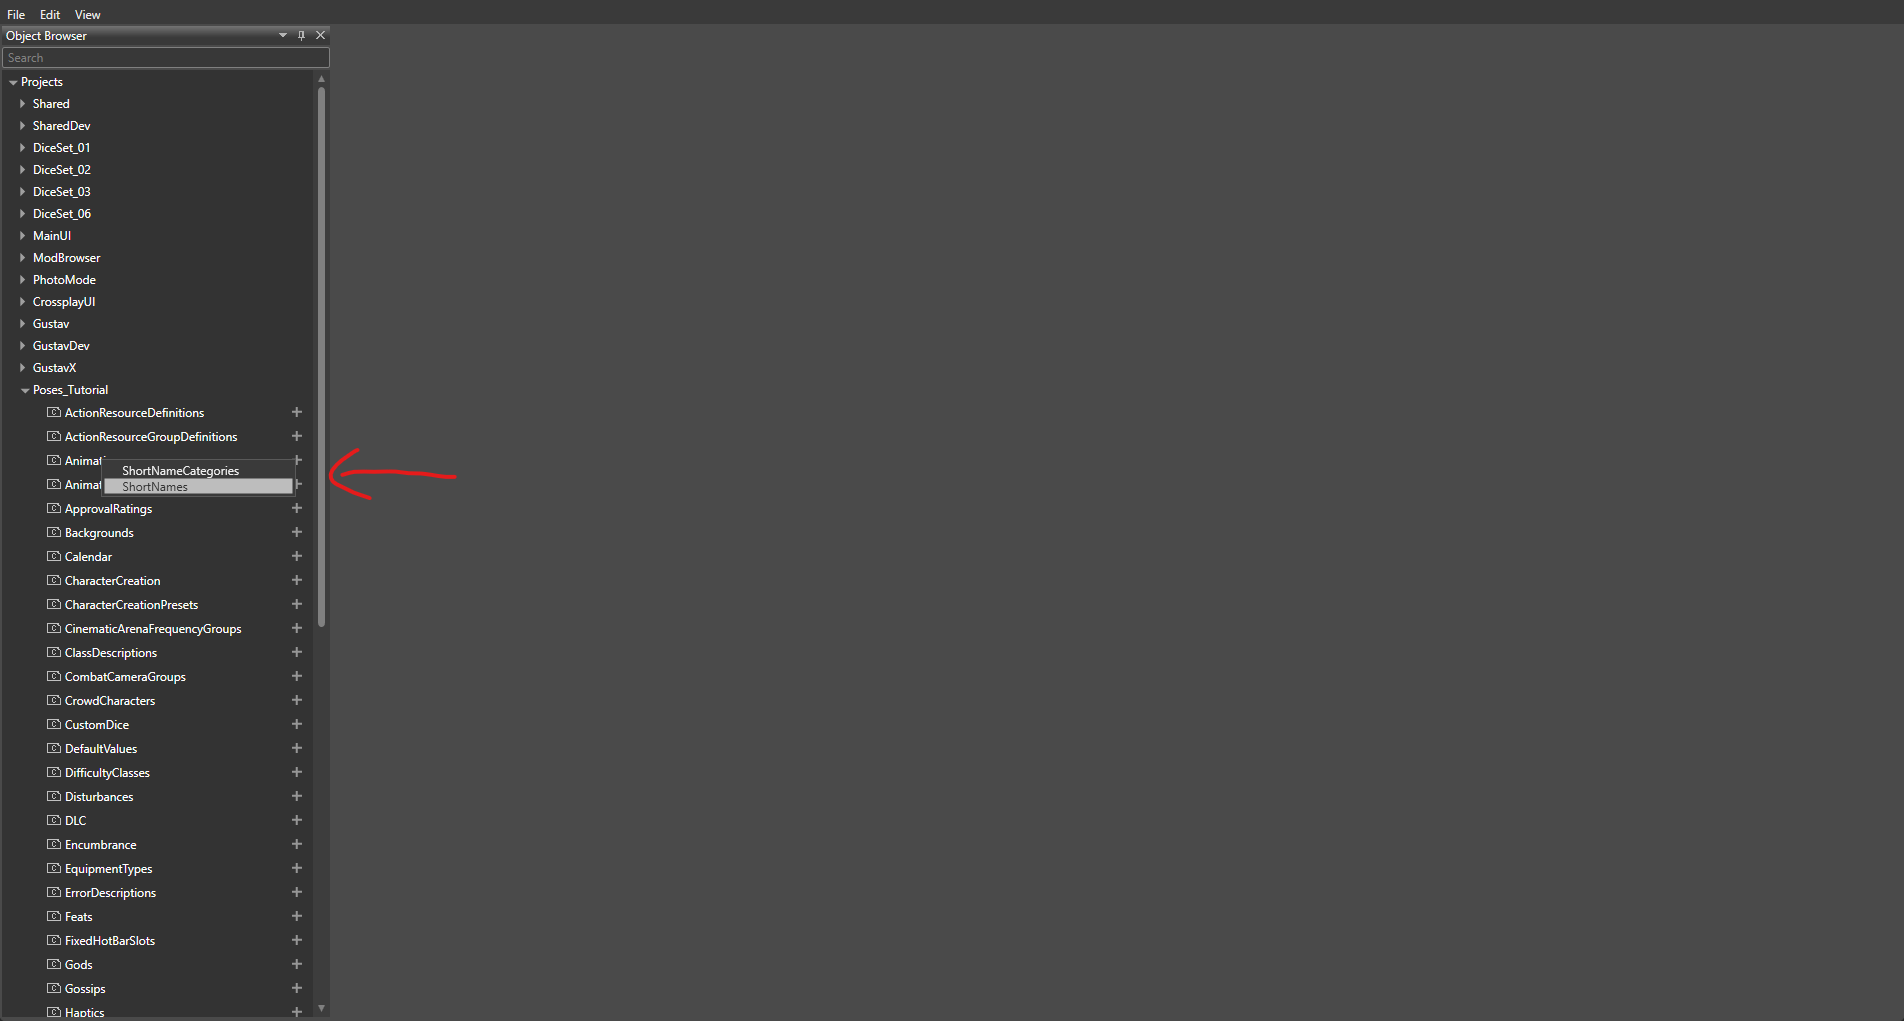
Now you want to add ShortNames for the animation files you have. Navigate to the ‘Animation' line, press the ’+' symbol and select ‘ShortNames’.
A new file names ‘ShortNames’ should generate under ‘Animation’, double click it to open it.
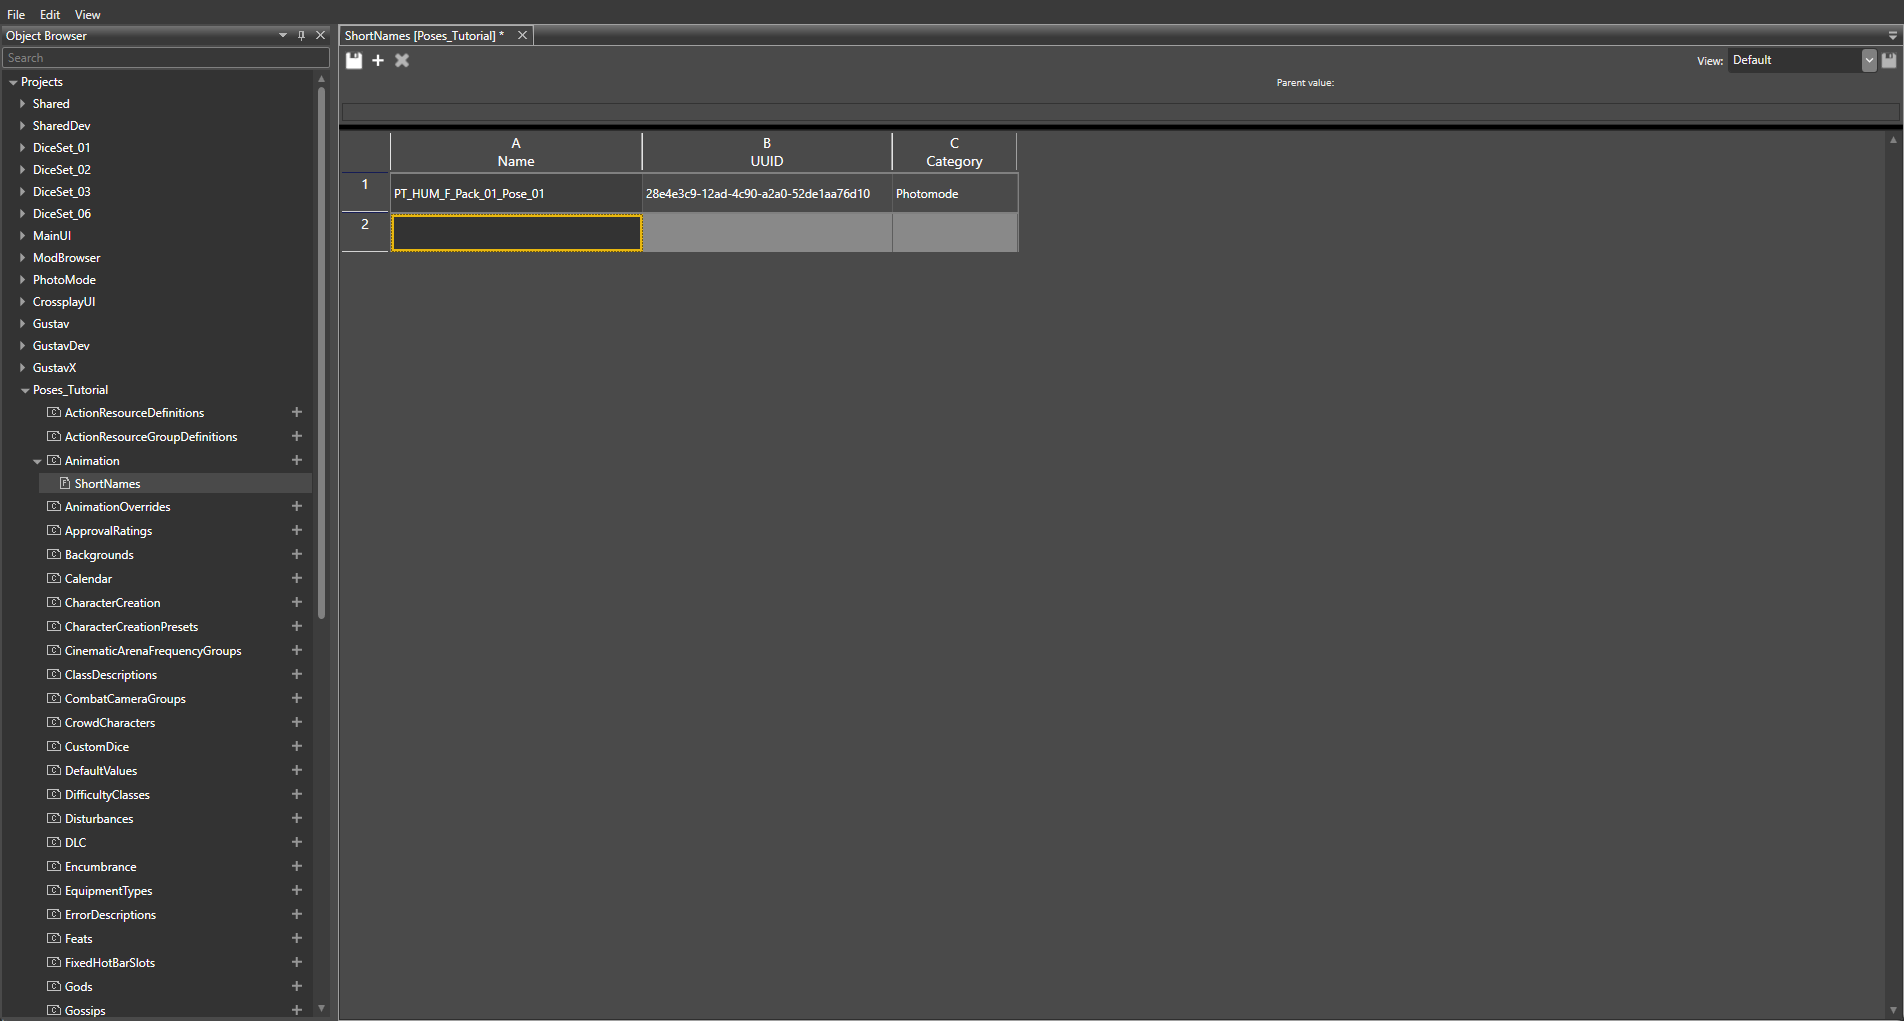
- For ‘Name’, you want to add an entry for each pose that you have. Not for a collection/pack, but for every single animation that you have (so for an animation with e.g. 10 static poses, add 10 entries).
- If you have one pose/animation adjusted for multiple body types you only need one shortname for them and then add the animations in their respective _Base
Example: HUM_F_Hugs_BT1 and the same pose adjusted for hight for HUM_M_Hugs_BT1 can share the same shortname.- The name here is the internal name for the file, and not what will be displayed in the game.
- Hit enter after naming an entry and it'll generate a UUID automatically.
- Under ‘Category’, you want to select ‘Photomode’.
Or you can make your own ShortnameCategory.
It should now looks something like this:
If you've made your own Shortname Category It should now looks something like this:
Add entries for however many animations/static poses that you have. Keep the tab open, you'll need the UUID's for the ShortNames entries later.
Press CTRL+S to save and export the file.
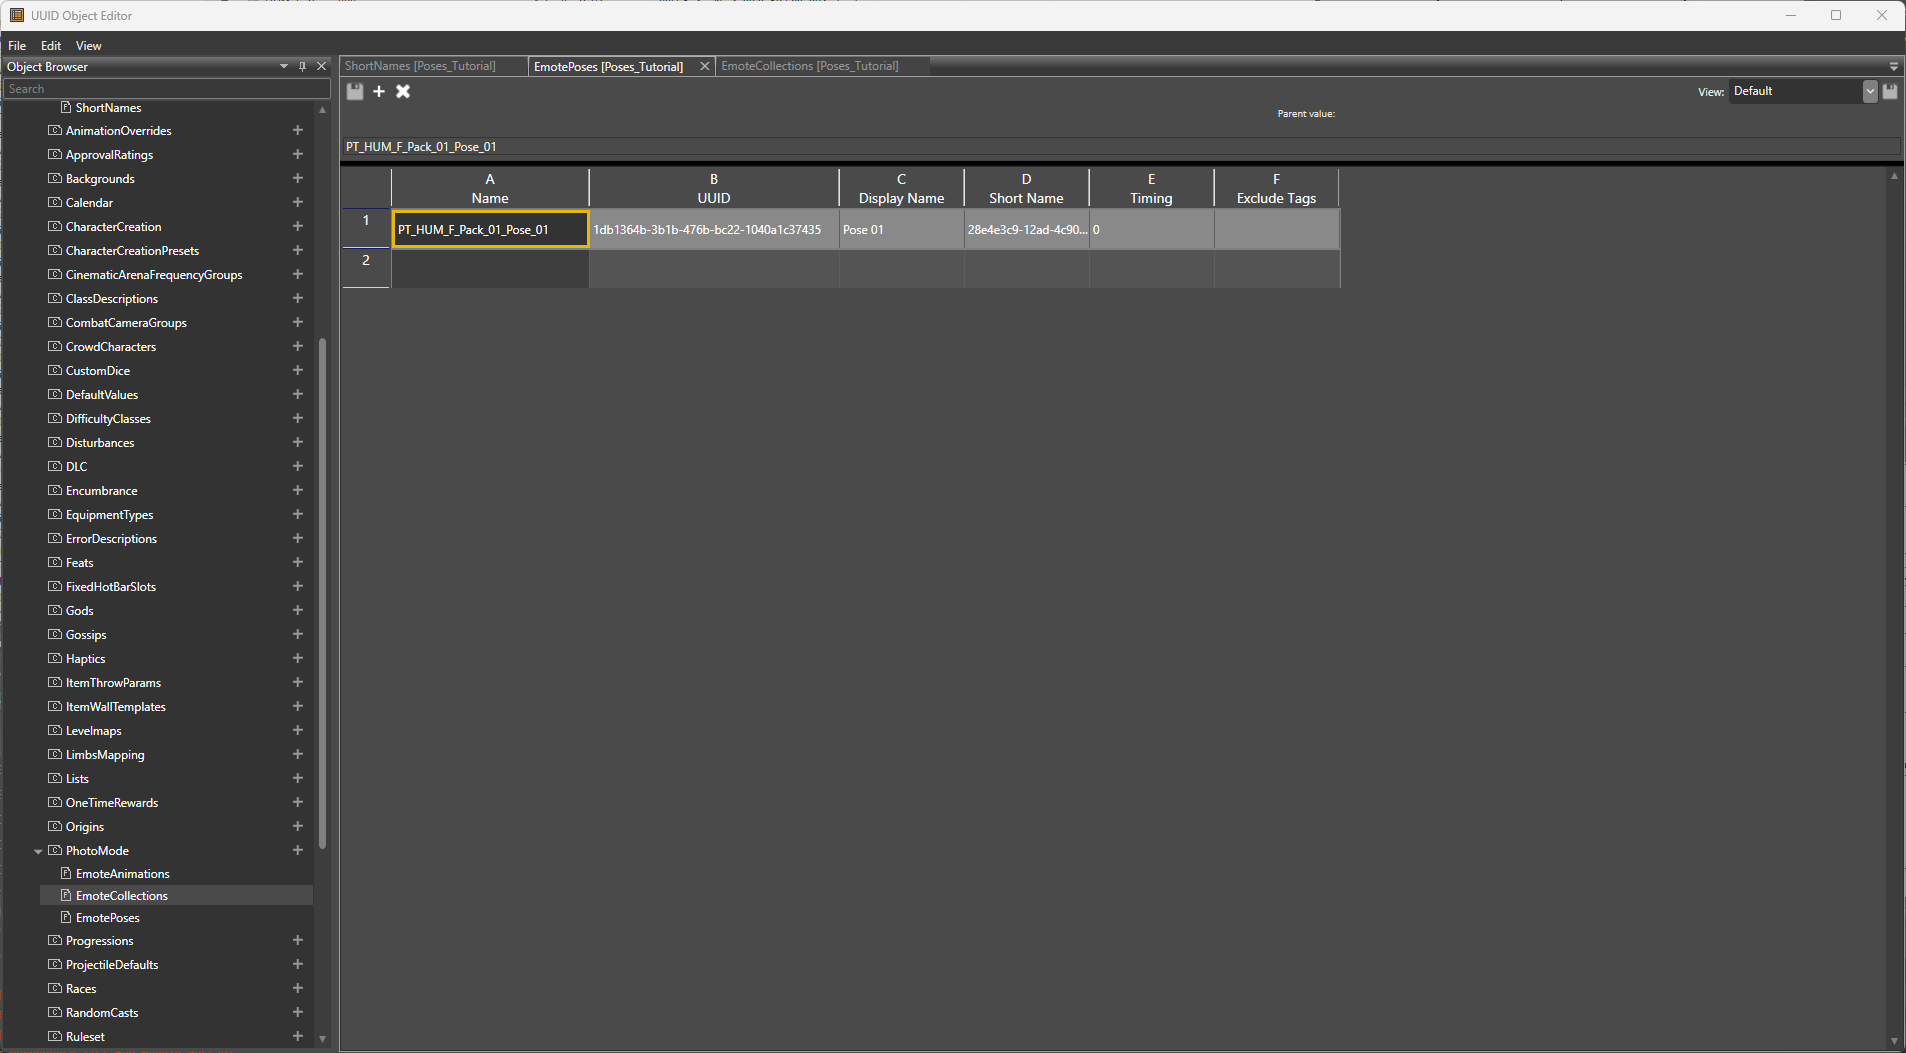
¶ 2.3 EmotePoses and EmoteAnimations
In the UUID Object Editor, under your project name, navigate to ‘Photomode’. Click the ‘+’ symbol, select ‘EmotePoses’ and open the file. Add an entry for each static pose that you have.
- For ‘Name’, use the same name that you did in ‘ShortNames’. Hit enter to generate the UUID.
- ‘Display Name’ is what shows up in the actual game. Name each pose accordingly.
- In ‘Short Name’, you want to navigate back to the ‘ShortNames’ tab and copy the UUID from the corresponding entry and paste it into the the relevant entry in ‘EmotePoses'.
- ‘Timing' is only relevant if you have several static poses in one animation. If you only have one static pose in one animation, set this to 0.
- ‘Exclude tags’ is not something that you need to touch. Leave it empty.
If you also have an animation file with an actual animation (rather than a static pose), follow these same steps but instead of adding ‘EmotePoses’, add ‘EmoteAnimations’ instead. The only difference is that is doesn't have ‘Timing’ in the tab.
Press CTRL+S to save and export the file.
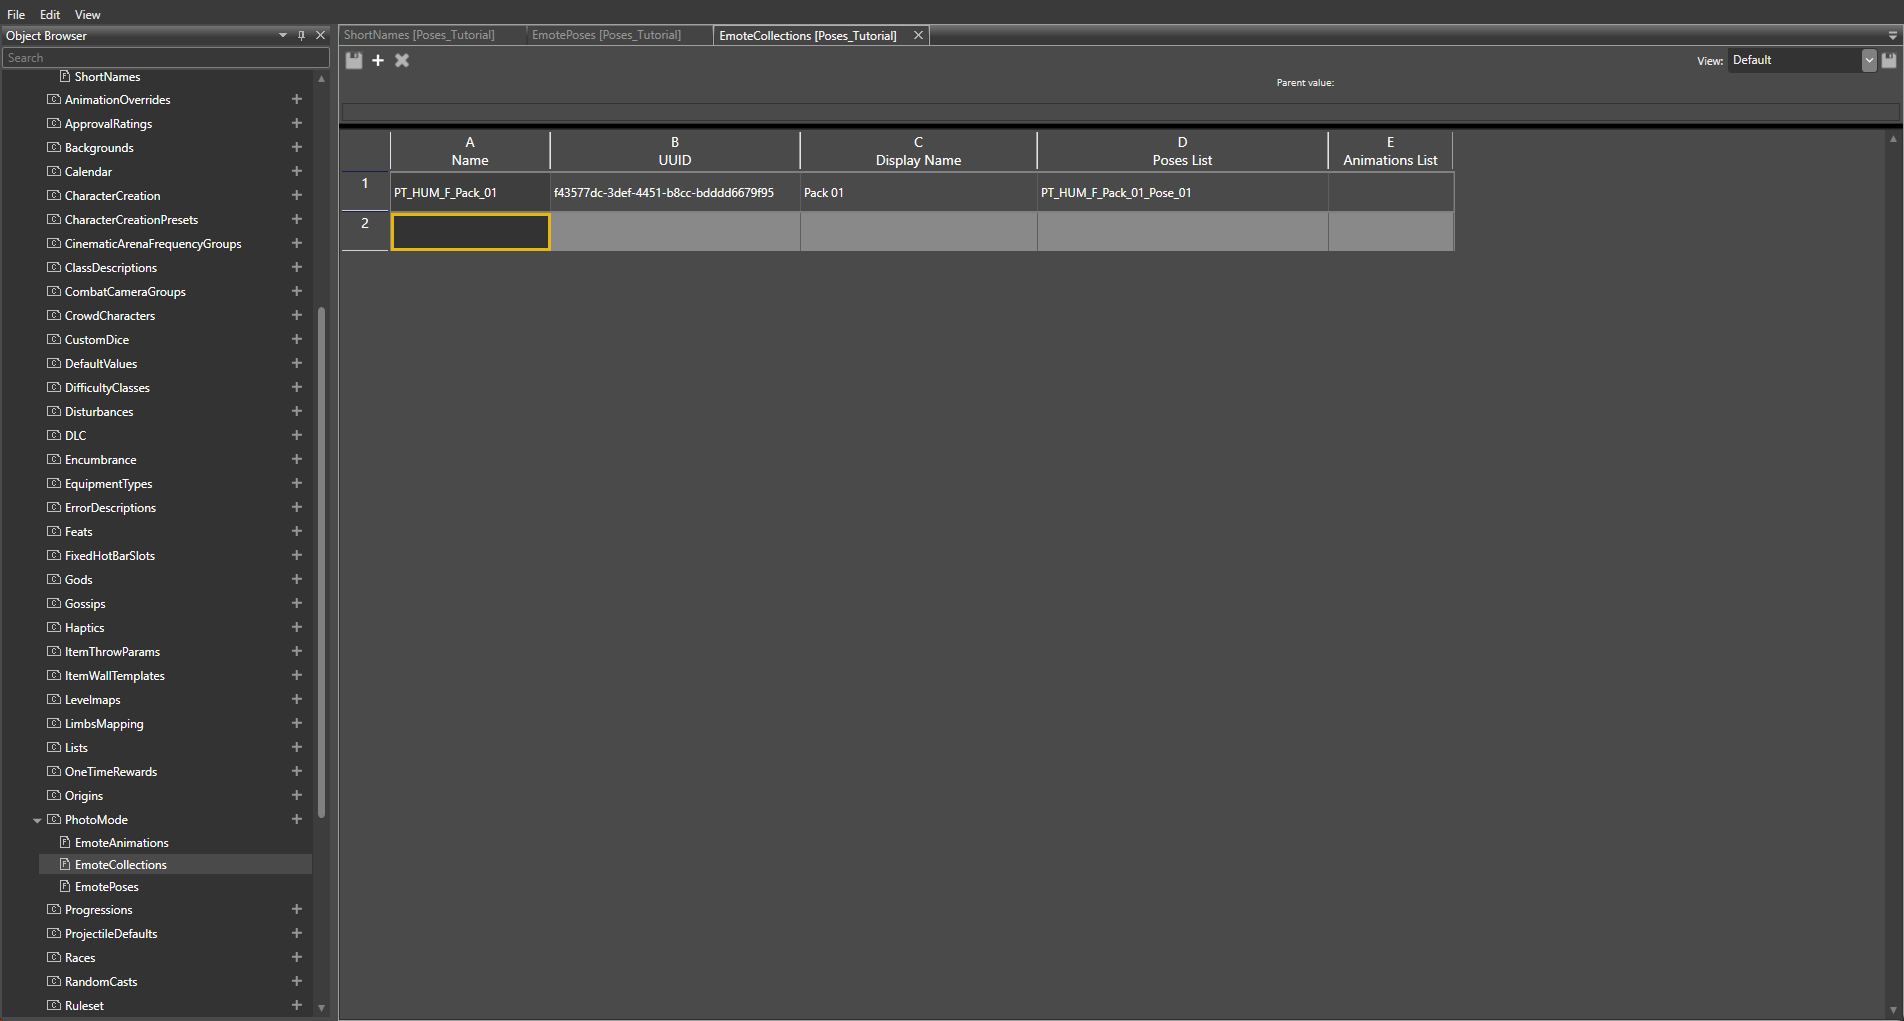
¶ 2.4 EmoteCollections
Remaining in the UUID Object Editor, you want to go to ‘Photomode’ again and this time add ‘EmoteCollections’.
- ‘Name’ is the internal name for the collection and should be unique to the collection you're adding. Hit enter to generate UUID
- ‘Display Name’ is what the collection will be called in the game. Name accordingly.
- ‘Poses List’ has a drop down where you can select the poses from ‘EmotePoses’ that you want to add to the collection.
- You can search for the poses you want to add. Double click to them add. Double click again on the same pose to remove.
- ‘Animations List’ is the same principle as the previous point, except for animations.
Each entry will add a new collection to the game, but you do not need a new entry for every pose/animation.
Press CTRL+S to save and export the file.
¶ 3. Adding The Animation Files in the _Base Files
Close down the UUID Object Editor. In the resource manager, navigate to your project folder and find the _Base you want to open first.
Double click the _Base file and this window should pop up. Navigate to ‘Photomode’ and expand it. Scroll down to the bottom of the entry, and you should see all the poses that you added in ‘ShortNames’
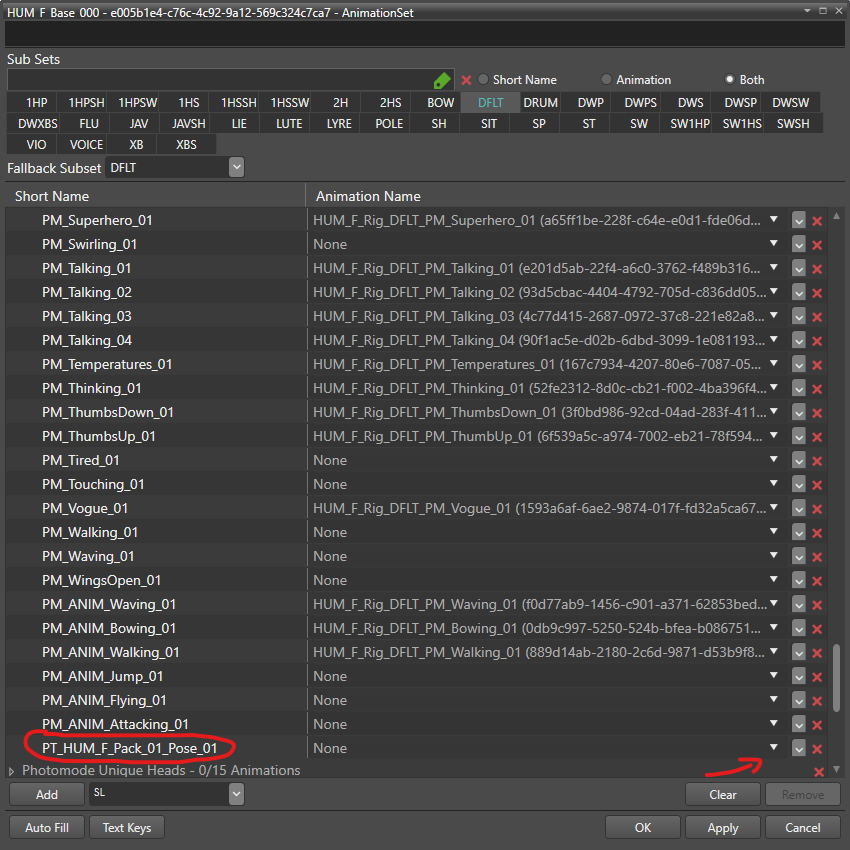
Select the drop down menu and search for the pose/animation corresponding to the short name entry and select it. Once you've done this for all the the short names and their poses/animations, click ‘Apply’ and then ‘OK’.
If you have made your own Shortname Category you will find your Category at the bottom of the _Base and only your shortnames are within it.

You should now have done everything there is to do regarding the Toolkit files!
¶ 4. Replacing An Animation File With Your Own .GR2
Click on your project folder in the Toolkit to see all your files. The Toolkit has a defined path for where each .GR2 is located. As seen in the image below, you can scroll down under the viewport for the animation to find the ‘Source File’ path. You want to copy the path from this and paste it into Windows Explorer, but delete the end part that has your .GR2 named file (in this example, I would have to delete ‘PoseTutorial_HUM_F_Pack_01.GR2’ from the path name) so the correct folder opens.

It's important that your custom animation .GR2 is named the same as the file in the Toolkit. When you've done that, go ahead and replace the vanilla .GR2 file with your own in the folder you just opened up.
Once you've replaced all the files you want to replace, you have to close down the Toolkit and open it again in order for your animations to show properly in the project folder.
¶ 5. Exporting the mod
Do the following
- Go to 'Project' → ‘Project Settings’ or CTRL+P for a shortcut.
- Fill out the the mandatory fields as well as the author field.
- Publish Local (automatically adds the mod to your Mods folder).
- Open BG3MM and add the mod to your load order and then export order to game.
You should now have a functioning mod in the game!