¶ Exporting out of Blender
Once we’ve created our hair mesh(es), have them all parented to the armature we want to use (and depending, also done a weight transfer from the vanilla hair the armature came from).
This isn’t very long but there are a lot of images, so don’t despair!
Why Conform?
If a hair exported directly as GR2 and put in game looks somewhat deformed and not quite attached, it can often be a skeleton issue. This can be solved by either using a hair_BaseUUID as your SkeletonResource, if available, or it can also be solved by using LSLIB to conform an exported dae to a vanilla GR2 and copying the skeleton from that.

¶ Preparation
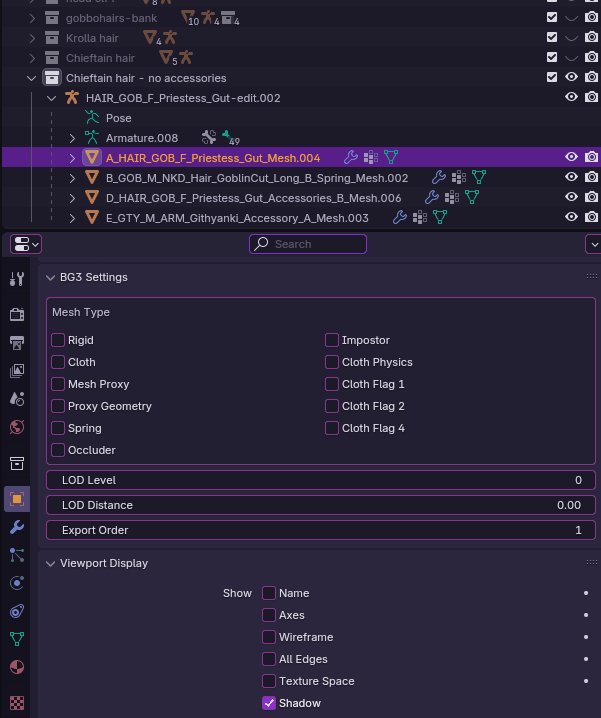
¶ LOD Distance and Export Order
These functions are from the BG3 Blender Helpers plugin (installation and link found here).
First, since we have not created LODs for this hair, we need to set the LOD Distance to 0, otherwise it can disappear when zooming out in game. Go through each mesh and make sure they are all 0.
At the same time, we need to define an Export Order for each mesh comprising our hair. In this example the hair is made up of 4 meshes, so they need to be ordered from 1-x. If the hair has only one mesh, just set it to 1.
¶ Mesh Data Names
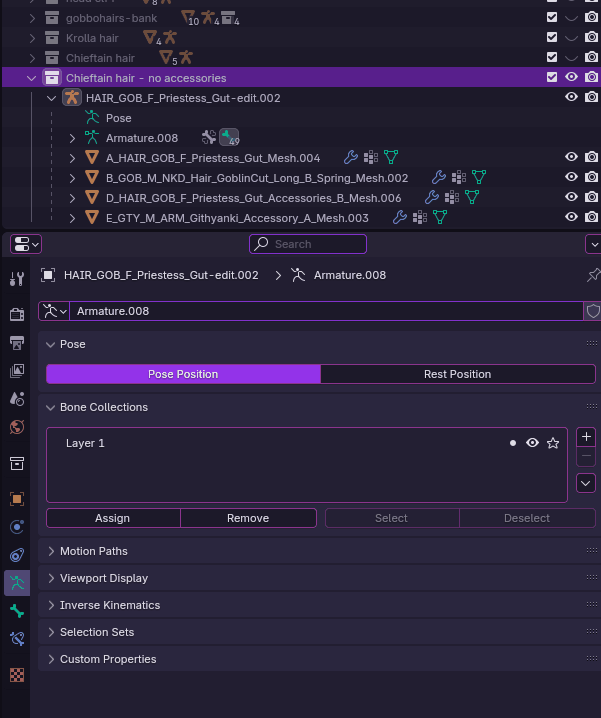
This part of the export process is specific to conforming. We will want to conform to a vanilla GR2, generally the same one we took the armature from.
When conforming to a vanilla GR2 with LSLIB, the tool will be looking for meshes with mesh data names matching the ones found in the vanilla hair.
In this example, I am using the armature and 2 meshes from HAIR_GOB_F_Priestess_Gut.GR2. The vanilla hair contains these meshes:
- HAIR_GOB_F_Priestess_Gut_Mesh
- HAIR_GOB_F_Priestess_Gut_Accessories_A_Mesh
- HAIR_GOB_F_Priestess_Gut_Accessories_A_Mesh
So any of our meshes not matching any meshes found in the vanilla hair will need to be renamed. Otherwise LSLIB will throw an error when trying to conform.
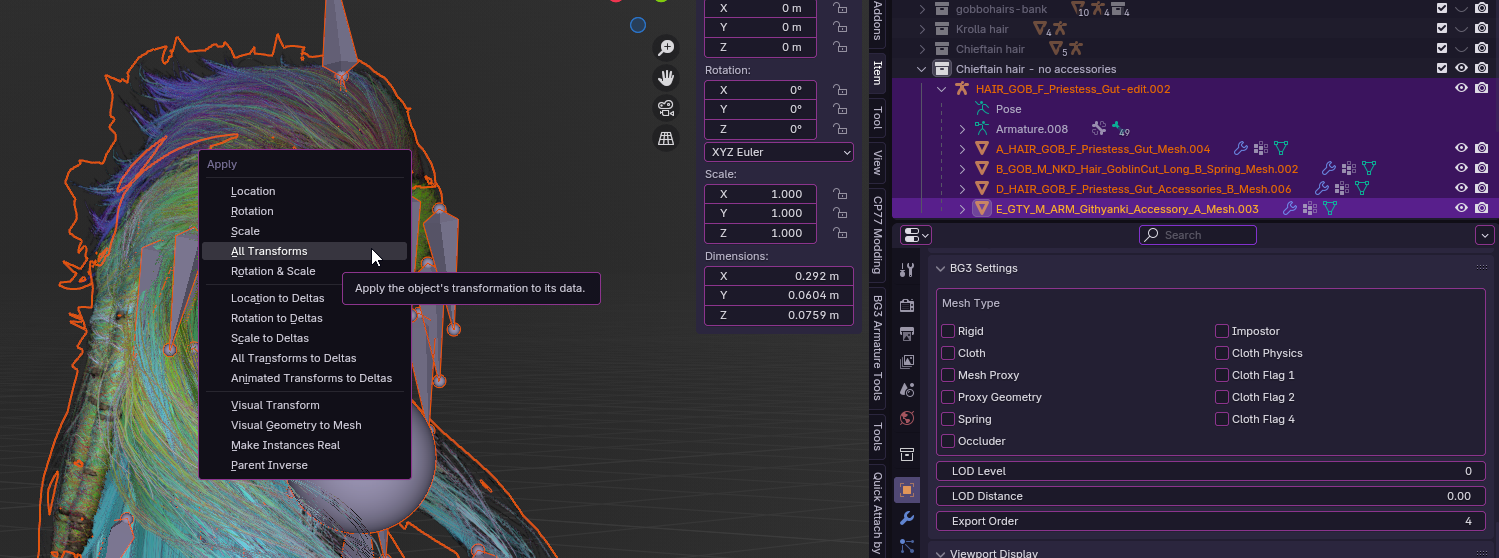
Note: Mesh data name is not the same as the mesh name. Mesh data names will be found in the properties editor, under the green triangle “Data” tab.

Here we can see that each mesh data name in the example is named according to this. The meshes taken from that hair originally will usually already have the appropriate data name (the Priestess Gut meshes), however we see that the mesh called
E_GTY_M_ARM_Githyanki_Accessory_A_Mesh and
B_GOB_M_NKD_Hair_GoblinCut_Long_B_Spring_Mesh
are not from that hair and so the mesh data name needs to be changed like so:
It doesn’t matter to which you assign each data name to, they just need to be the same as the vanilla.
¶ Exporting
Once that’s done, we can export. First, select all of your meshes+armature and, with your cursor in the viewport, do Ctrl+A -> Apply -> All transforms. This should prevent the meshes falling to the floor once in game due to incorrect rotation.
Now, keeping them all selected, head to File -> Export -> DOS2/BG3 Collada
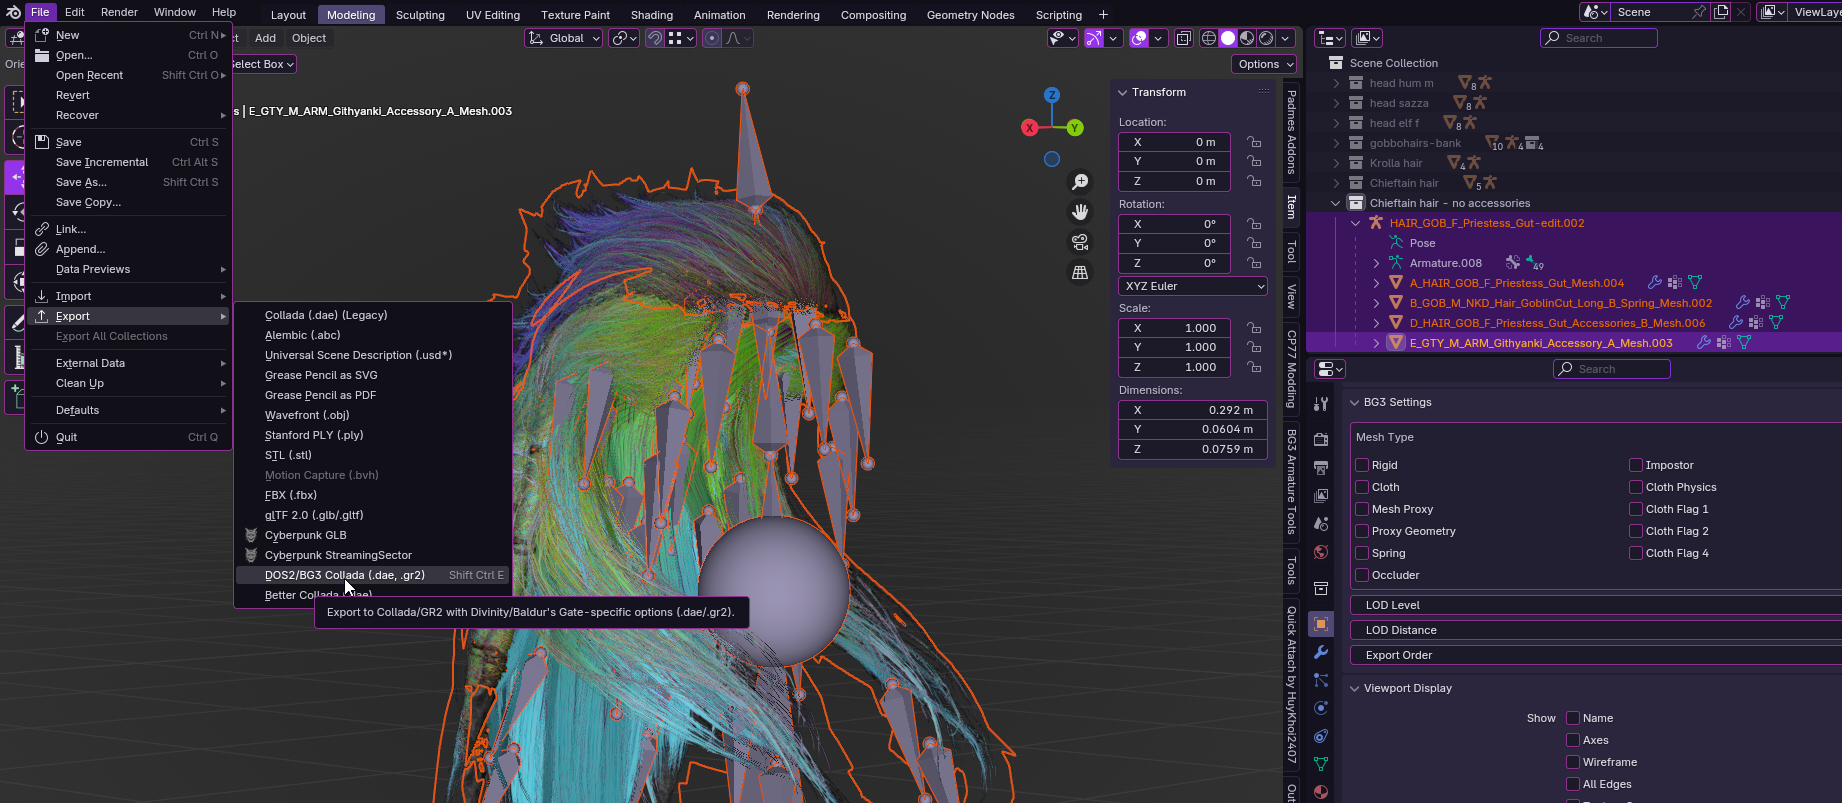
Make sure you use these export settings. Specifically:
• change the extension to .dae if it isn’t already
• choose Selected Only instead of Visible Only
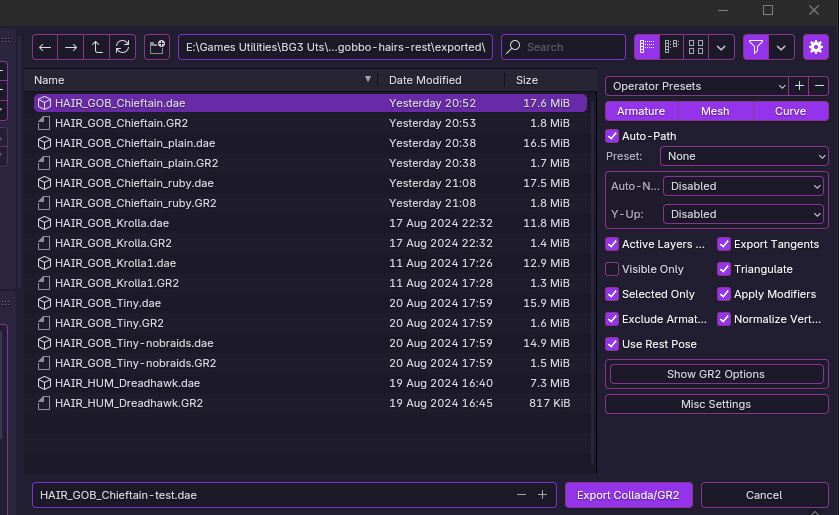
then click Export Collada/GR2. Blender should give a little note at the bottom of the window that the export was successful.
¶ LSLIB
After we exported our hair .dae, we can now open LSLIB/ConverterTool (Getting Started tutorial here)
In the GR2 Tools tab, we need to set the Input File Path to our .dae, and set a directory for the to-be-exported GR2. In this example I set it the same, just changed the extension:
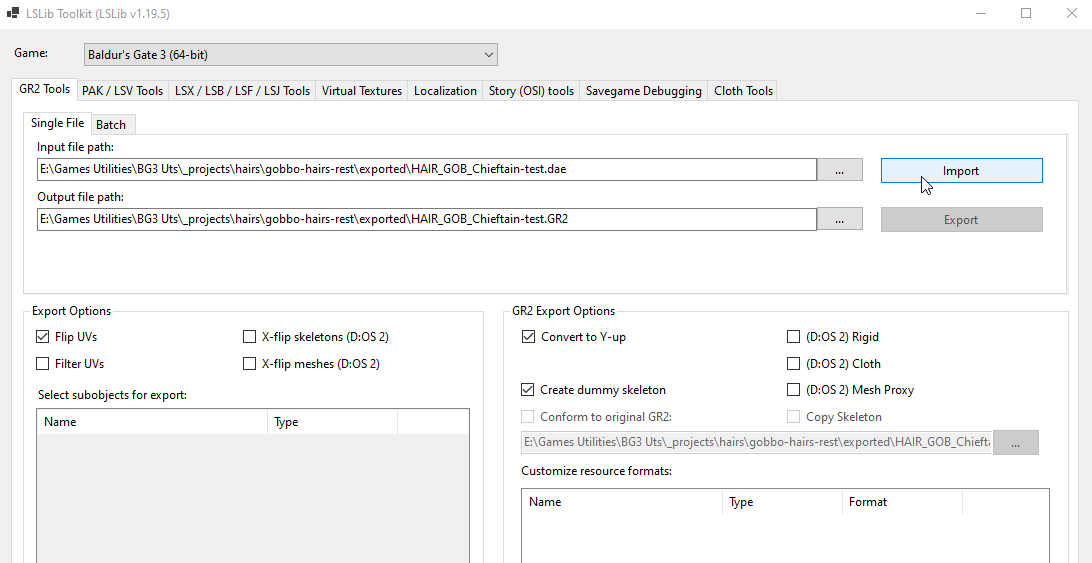
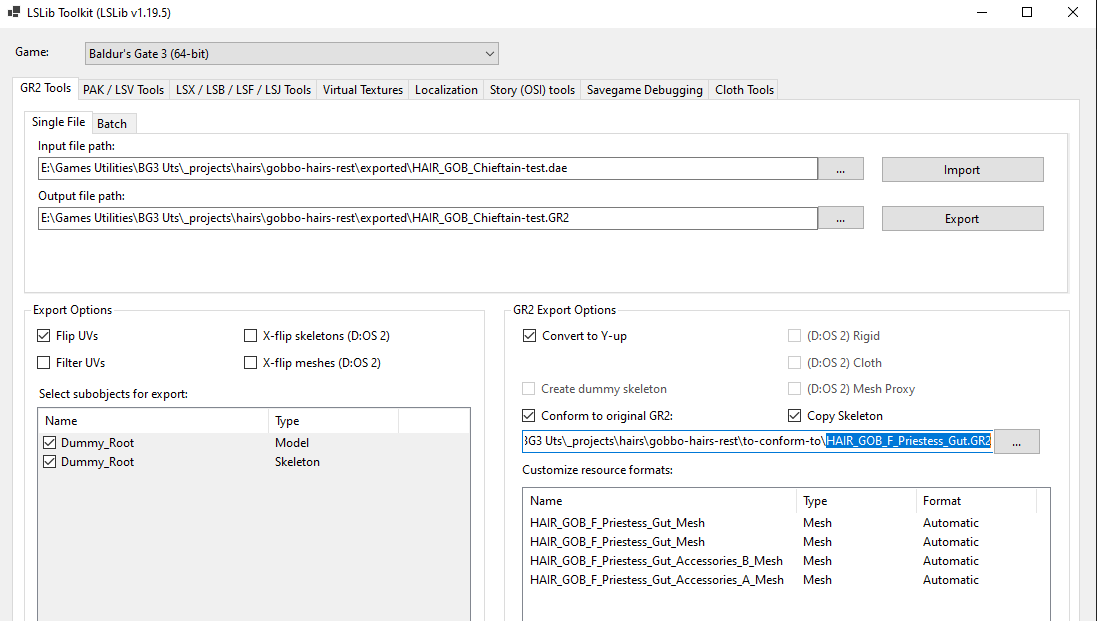
As we can see, Export is still greyed out. We need to hit Import, to open up the options we need to:
- untick the box for X-flip meshes on the left,
- on the right choose Conform to Original GR2 and Copy Skeleton
- put the GR2 of the vanilla hair we used the armature from back in Blender in the field
All of our meshes are listed in the customize resource formats box below, they should only have names belonging to this vanilla GR2. If any of them has an “unexpected” mesh data name, LSLIB will throw an error when selecting Export.
So let’s do that. Once Export is selected we should see a pop-up confirming that it was successful. If we head to the directory we sent the GR2 to, our new conformed GR2 should be there.
Next: File Setup